How to Install WordPress on cPanel (Step-by-Step Guide for Beginners)
How to install WordPress on cPanel is the easiest way to launch a WordPress website. Whether you’re creating a blog, business website, portfolio, or online store, this guide shows you how to install WordPress on cPanel using Softaculous in just a few minutes.
Fortunately, learning how to install WordPress on cPanel is much easier than many beginners expect. Thanks to cPanel and the Softaculous installer, you can complete the entire setup in just a few minutes. As a result, you can focus more on building your website instead of dealing with technical configurations.
In this step-by-step guide, you’ll learn exactly how to install WordPress on cPanel using the easiest method available. Along the way, you’ll also discover practical tips, common mistakes to avoid, and a few best practices that can save you time later.
Whether this is your first website or you’re learning how to install WordPress on cPanel for a new project, this tutorial will help you complete the process with confidence.
Estimated Time: 5–10 Minutes
Difficulty Level: Beginner
Method: Softaculous One-Click Installer
Why Install WordPress on cPanel?
Learning how to install WordPress on cPanel is the preferred choice for beginners because the installation process is fast, secure, and requires no coding knowledge. Most hosting providers include Softaculous, making WordPress installation on cPanel simple and reliable.
Instead of uploading WordPress files manually or creating a database yourself, you can install everything through Softaculous with just a few clicks. Consequently, the installation process becomes faster, safer, and much more beginner-friendly.
Another advantage is that cPanel allows you to manage nearly every aspect of your hosting account from one place. For instance, you can upload files, manage databases, create email accounts, install SSL certificates, and monitor your website without leaving the dashboard.
Moreover, if you ever need to troubleshoot a problem or make changes to your hosting settings, cPanel provides the tools you’ll need in an organized interface.
Benefits of Installing WordPress on cPanel
Choosing cPanel offers several important benefits.
Quick Installation The entire installation usually takes less than five minutes. Therefore, you can launch your website much faster than with a manual installation.
Beginner-Friendly Interface Even if you’ve never managed a website before, cPanel is relatively easy to understand. Additionally, most hosting companies use a similar layout, so the learning curve is minimal.
Automatic Database Creation Normally, a manual WordPress installation requires creating a MySQL database. However, Softaculous automatically handles this task, reducing the chance of configuration errors.
Automatic WordPress Installation Rather than uploading dozens of files yourself, Softaculous installs the latest stable version of WordPress automatically. As a result, you can start working on your website immediately.
Easy Website Management After the installation is complete, you can return to cPanel whenever you need to:
- Manage website files
- Create email accounts
- Access backups
- Update PHP settings
- Monitor disk usage
- Manage databases
Because everything is available in one location, managing your website becomes much more convenient.
Better Security Most modern hosting providers include free SSL certificates, malware protection, and automatic backups through cPanel. Furthermore, keeping your hosting environment updated helps improve your website’s overall security.
Is Installing WordPress on cPanel the Best Method?
For most beginners, the answer is yes.
While manual installation gives you more control, it also requires additional technical knowledge. Specifically, you’ll need to upload WordPress files, create a database, configure user permissions, and complete several extra steps.
On the other hand, Softaculous completes those tasks automatically. Consequently, the risk of making installation mistakes is much lower.
Nevertheless, advanced developers sometimes choose manual installation for custom server environments or specific development workflows. If you’re just starting out, however, the one-click installation method is the better choice.
Who Should Follow This Guide?
This tutorial is designed for anyone who wants to install WordPress quickly and correctly. For example, it’s ideal for:
- Beginners creating their first website
- Bloggers starting a personal blog
- Small business owners
- Freelancers building a portfolio
- Agencies creating client websites
- Students learning WordPress
- Anyone migrating to a self-hosted WordPress website
Even if you’ve installed WordPress before, you may still discover useful tips that make the process smoother.
Before You Install WordPress on cPanel
Before moving to the next section, make sure you’ve chosen a hosting provider that includes cPanel and Softaculous. Although most shared hosting plans offer these features, it’s always worth confirming before you begin.
In the next section, you’ll learn exactly what you need before starting the installation, including your domain name, hosting account, and cPanel login credentials. After that, you’ll log in to cPanel and prepare your hosting account for the WordPress installation.
Now that you understand why cPanel is the easiest way to install WordPress, it’s time to prepare everything you need. Fortunately, the setup process is straightforward. As long as you have a domain name, a hosting account, and your cPanel login details, you can complete the installation without any technical experience.
Let’s go through each requirement before opening cPanel.
What You Need Before You Install WordPress on cPanel
Preparing these essentials in advance will help you avoid interruptions during the installation process. Moreover, checking everything beforehand reduces the chances of configuration errors.
1. A Domain Name
A domain name is your website’s online address. Visitors will type this address into their browser to access your website. Examples include:
- yourwebsite.com
- example.net
- mybusiness.org
If you haven’t registered a domain yet, purchase one from a trusted registrar before continuing. Afterwards, connect it to your hosting account using the nameservers provided by your hosting company.
Pro Tip: Choose a domain name that is short, memorable, and easy to spell. Whenever possible, avoid unnecessary numbers or hyphens.
2. A Web Hosting Account
In addition to a domain name, you’ll need a hosting plan that supports WordPress. Before purchasing hosting, check whether it includes:
- cPanel access
- Softaculous Apps Installer
- PHP 8.x support
- MySQL or MariaDB databases
- Free SSL certificate
- Automatic backups
- 24/7 customer support
Although many hosting providers offer these features, it’s always a good idea to compare plans before making a decision.
3. cPanel Login Details
After your hosting account is activated, you’ll receive a welcome email. Typically, this email contains:
- cPanel login URL
- Username
- Password
- Name servers
- FTP details
- Account information
Save these details somewhere secure. Later, you’ll use them whenever you need to manage your website.
4. A Stable Internet Connection
A reliable internet connection makes the installation process much smoother. For instance, if your connection drops while the installation is running, you may need to repeat some of the steps. Therefore, using a stable connection is always recommended.
What Is Softaculous for Installing WordPress on cPanel?
Softaculous is a one-click application installer available in many cPanel hosting accounts. Instead of installing WordPress manually, it automates almost every part of the process. Specifically, Softaculous can:
- Download the latest WordPress version
- Create the required database
- Configure installation settings
- Generate an administrator account
- Complete the installation automatically
Because it handles the technical work for you, Softaculous is the preferred option for beginners.
Why Use Softaculous Instead of Manual Installation?
Both installation methods work. However, they are designed for different types of users.
Softaculous Installation Choose this method if you want a fast setup with no coding required. Additionally, it offers automatic database creation, a beginner-friendly process, and fewer installation errors.
Manual Installation Manual installation is better suited for advanced users who need greater control over server settings or custom environments.
If you’re installing WordPress for the first time, the Softaculous method is the safest and easiest choice.
Step 1: Log In to Your cPanel Account
Once you’ve prepared everything, you’re ready to access your hosting dashboard. First, open your browser and enter your cPanel login address. Depending on your hosting provider, it may look like one of these:
https://yourdomain.com/cpanel
or
https://yourdomain.com:2083
Next, enter your username and password. Finally, click Log In. If your login details are correct, the cPanel dashboard will load within a few seconds.
Explore the cPanel Dashboard
At first glance, cPanel may seem overwhelming because it contains many tools. Nevertheless, you only need a few of them to install WordPress. Some of the most important sections include:
Files — Use this area to manage website files through the File Manager.
Databases — Here you can create and manage MySQL databases. Fortunately, Softaculous creates the required database automatically.
Domains — This section allows you to manage addon domains, subdomains, and redirects.
Email — Create professional email addresses such as
For example:
info@yourdomain.com
support@yourdomain.com
contact@yourdomain.com
Software — Most importantly, this section contains the Softaculous Apps Installer, which you’ll use to install WordPress.
Step 2: Open Softaculous to Install WordPress on cPanel
Now scroll down until you find the Software section. Next, click Softaculous Apps Installer. After a few moments, Softaculous will display a list of popular applications.
Since you’re installing WordPress, click the WordPress icon. Because WordPress is one of the most widely used content management systems, it’s usually displayed near the top of the page.
Quick Checklist Before Continuing
Before moving to the next step, confirm that you’ve completed everything below:
- Purchased a domain name
- Activated your hosting account
- Then received your cPanel login details
- Logged in to cPanel successfully
- Afterward, opened the Softaculous Apps Installer
- Finally, selected WordPress
Excellent! You’re now ready to configure the installation settings. In the next section, you’ll learn how to choose the correct installation URL, create a secure administrator account, enable HTTPS, and complete the WordPress installation without making common beginner mistakes.
Step 3: Click Install Now to Install WordPress on cPanel
After opening the WordPress page in Softaculous, you’ll see an overview of the application, including its latest version, ratings, and available installation options. To continue, click the Install Now button. Within a few seconds, the WordPress installation form will appear.
Step 4: Select Your Installation URL for WordPress on cPanel
The first section asks where you’d like to install WordPress on cPanel. Before moving forward, review each option carefully.
Choose Your Domain If your hosting account includes multiple domains, select the correct one from the drop-down list. For example, you might see yourdomain.com, blog.yourdomain.com, or store.yourdomain.com. Choose the domain where you want visitors to access your website.
Select HTTPS Next, choose the website protocol. If your SSL certificate is already active, select https:// instead of http://. Using HTTPS encrypts data between your website and its visitors. More importantly, Google considers HTTPS a positive ranking signal.
Leave the Directory Field Blank Many beginners accidentally type “wordpress” in the In Directory field. However, you should leave this field empty if you want WordPress installed on your main domain.
✅ Correct: https://yourdomain.com
❌ Incorrect: https://yourdomain.com/wordpress
Only enter a directory name if you’re intentionally creating a separate WordPress installation.
Step 5: Enter Website Information for WordPress on cPanel
After choosing the installation URL, you’ll need to provide some basic information about your website. Although these settings can be changed later, it’s a good idea to configure them correctly from the beginning.
Site Name Your Site Name is the primary name of your website. Examples include Web Dream Agency, Digital Marketing Hub, My Travel Journal, or Healthy Living Blog. Choose a name that matches your brand and is easy for visitors to remember.
Site Description The Site Description (or Tagline) briefly explains what your website offers. For example: “Professional Web Design & SEO Services,” “Easy WordPress Tutorials for Beginners,” or “Practical Tips for Small Business Owners.” A clear description helps both visitors and search engines understand your website.
Step 6: Create an Administrator Account for WordPress on cPanel
Your administrator account controls every part of your WordPress website. Therefore, it’s important to create secure login credentials from the start.
Choose a Unique Username Avoid common usernames such as admin, administrator, or test. Instead, choose something unique, such as webdreamadmin, davidwp, or agencyowner. A unique username makes brute-force attacks more difficult.
Create a Strong Password Softaculous usually generates a secure password automatically. If you decide to create your own, include uppercase letters, lowercase letters, numbers, and special characters — for example, Wp@Secure2026!. Meanwhile, avoid simple passwords like 123456, password, admin123, or qwerty. Strong passwords provide better protection against unauthorized access.
Enter Your Administrator Email Next, enter an email address that you check regularly. WordPress uses this email for password recovery, update notifications, security alerts, and website administration messages. Double-check the address before continuing to avoid missing important notifications.
Step 7: Choose Language Before Installing WordPress on cPanel
Softaculous allows you to select the default language before you install WordPress on cPanel. If you’re creating an English website, choose English. Otherwise, select the language that best matches your audience. Don’t worry if you’re unsure, since you can change the language later from the WordPress dashboard.
Step 8: Review Advanced Options for Installing WordPress on cPanel
Before clicking the Install button, scroll down to the Advanced Options section. Although most default settings work well, it’s worth reviewing them.
Database Name Softaculous automatically creates a database for your website. In most cases, you don’t need to change anything here.
Automatic Updates You’ll also find options for automatic updates. Consider enabling minor WordPress updates along with security updates, since keeping WordPress updated helps protect your website and improve stability.
Automatic Backups Some hosting providers allow you to schedule automatic backups during installation. If this option is available, enable it, as regular backups make it easier to restore your website if something unexpected happens.
Step 9: Review Settings Before Installing WordPress on cPanel
Before you install WordPress on cPanel, take one final look at your settings. Use this checklist to make sure everything is correct:
- Selected the correct domain
- Also enabled HTTPS
- Left the directory field blank
- Added a professional Site Name
- Then wrote a meaningful Site Description
- Created a unique administrator username
- Chose a strong password
- Entered the correct administrator email
- Finally, reviewed the advanced options
Spending an extra minute here can help you avoid unnecessary changes later.
Step 10: Install WordPress on cPanel
Once you’re satisfied with the settings, click the Install button. Softaculous will automatically download the latest version of WordPress, create the required database, configure your website, generate the administrator account, and complete the installation. In most cases, the process takes between one and three minutes. During this time, avoid refreshing the page or closing your browser.
Installation Complete
After the installation finishes, you’ll see a confirmation message. Softaculous will display two important links:
Website URL: https://yourdomain.com
Administrator Login URL: https://yourdomain.com/wp-admin
Bookmark the wp-admin link because you’ll use it whenever you want to log in and manage your website.
Quick Recap
Before moving to the next section, make sure you’ve completed these steps:
- Clicked Install Now
- Selected the correct domain
- Also enabled HTTPS
- Left the directory field blank
- Added your website information
- Created a secure administrator account
- Then reviewed the advanced options
- Finally, installed WordPress successfully
Congratulations! Your WordPress installation is now complete. In the next section, you’ll log in to the WordPress Dashboard, configure the essential settings, and prepare your website for customization and content creation.
Step 11: Log In After Installing WordPress on cPanel
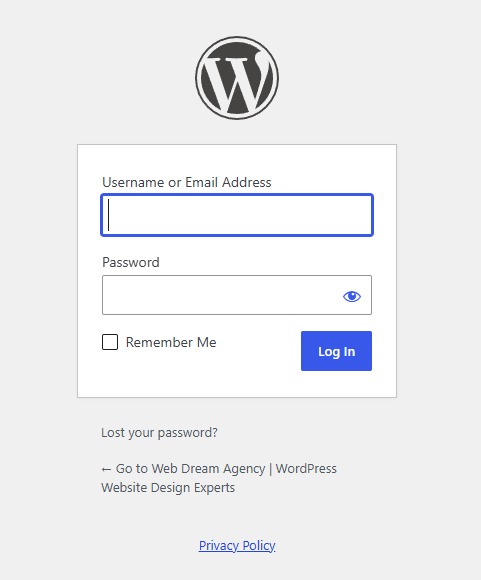
After the installation finishes, Softaculous displays two important links: the Website URL and the Administrator Login URL. In most cases, your login page will look like this:
https://yourdomain.com/wp-admin
After you install WordPress on cPanel, open the administrator URL in your browser. Next, enter the username and password you created during the installation process, then click Log In. If your login details are correct, the WordPress Dashboard will open within a few seconds.
What Is the WordPress Dashboard?
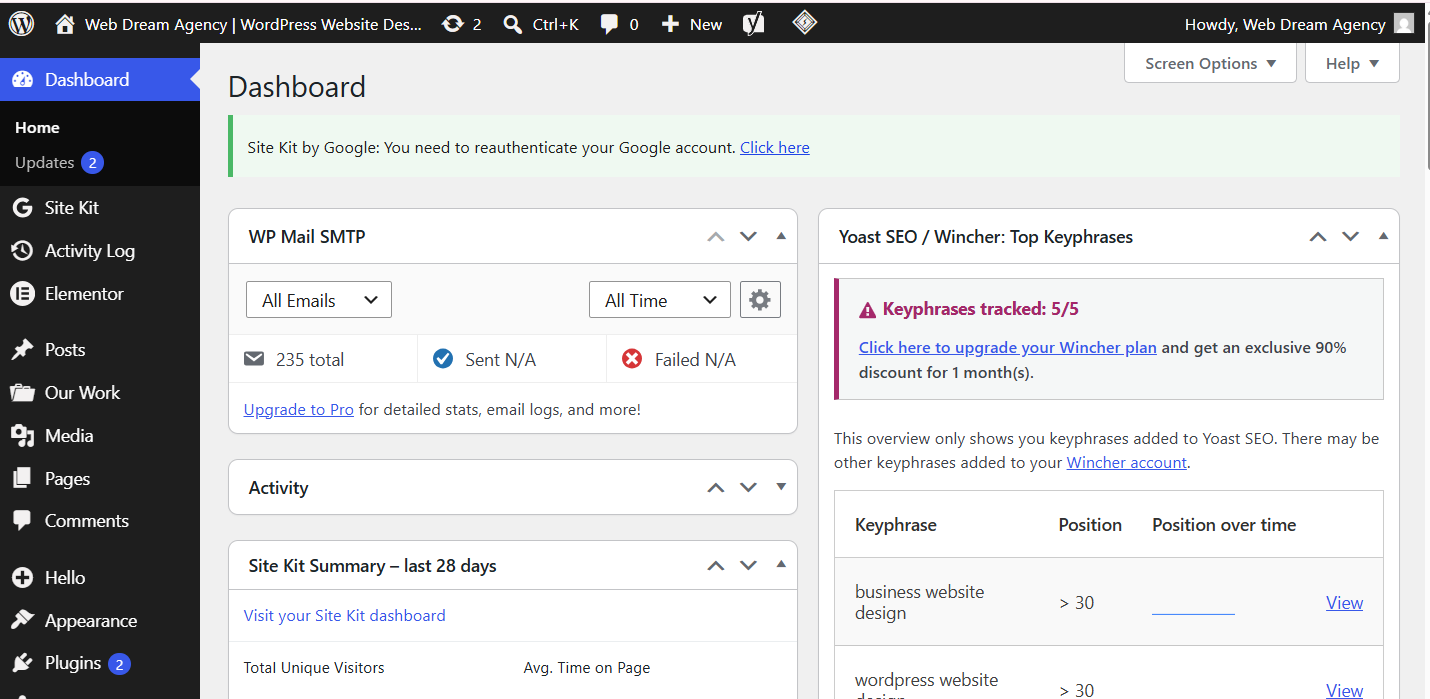
The WordPress Dashboard is the main control panel for your website. From here, you can create blog posts, publish pages, upload images, install themes, add plugins, manage users, and change website settings. In other words, almost every task you perform in WordPress starts from the dashboard. Although the interface may seem busy at first, you’ll become familiar with it after using it for a short time.
Explore the Dashboard Menu
Take a few minutes to explore the menu on the left side of the screen. Here are the sections you’ll use most often.
Dashboard
This page provides an overview of your website, including updates, site health information, recent activity, quick draft options, and WordPress news. Checking this page regularly helps you stay informed about your website.
Posts
The Posts section is where you’ll create blog articles. Whenever you publish tutorials, news, or updates, you’ll use this menu. Additionally, you can organize posts using categories and tags.
Pages
Unlike blog posts, pages are designed for permanent content. Common examples include Home, About Us, Services, Contact, and Privacy Policy. Because these pages rarely change, they remain separate from your blog posts.
Media
The Media Library stores every image, video, PDF, and document you upload. Before uploading images, remember to compress large files, rename image files, and add descriptive alt text. These small improvements can enhance both website performance and image SEO.
Appearance
The Appearance section controls your website’s design. Later, you’ll use this menu to install themes, customize colors, upload your logo, create navigation menus, and manage widgets. Fortunately, most modern themes are easy to customize without writing code.
Plugins
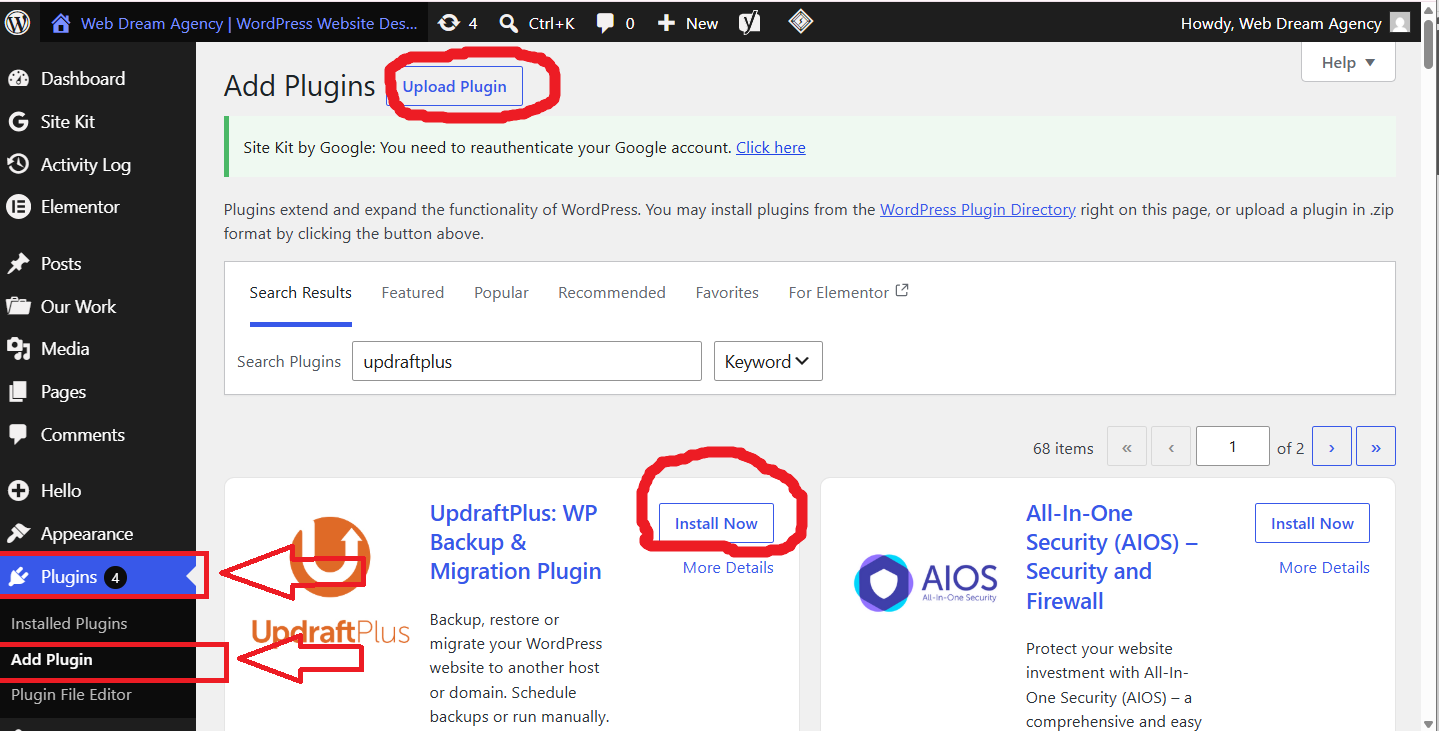
Plugins extend your website’s functionality. For example, you can install plugins for SEO, security, backups, contact forms, and caching. However, avoid installing unnecessary plugins because too many can reduce your website’s performance.
Users
This section lets you manage administrator accounts, editors, authors, and subscribers. If you’re the only person managing the website, you’ll mainly use it to update your own profile and password.
Settings
The Settings menu contains your website’s most important configuration options. Here you can change your website title, update the tagline, configure permalinks, set the time zone, adjust reading settings, and manage discussion options. We’ll configure these settings in the next steps.
Step 12: Update Your Site Title
One of the first settings you should review is your Site Title. Go to Settings → General, then locate the Site Title field. Enter the official name of your website or business — for example, Web Dream Agency, Creative Digital Studio, My Travel Journal, or Healthy Lifestyle Blog. Choose a title that’s easy to remember and accurately represents your brand.
Add a Professional Tagline
Directly below the Site Title, you’ll find the Tagline field. A tagline briefly explains what your website is about, such as “Professional Web Design & SEO Services,” “WordPress Tutorials for Beginners,” or “Helping Small Businesses Grow Online.” Although the tagline isn’t always displayed by every theme, it’s still a good practice to write one. Furthermore, a clear tagline helps define your website’s purpose.
Verify Your Website Address
While you’re in the General Settings page, check the WordPress Address (URL) and Site Address (URL) fields. If your SSL certificate is active, both addresses should begin with https://. Avoid using http:// unless HTTPS hasn’t been configured yet, since using HTTPS improves website security and builds trust with your visitors.
Save Your Changes
After reviewing the settings, click the Save Changes button. Although this step takes only a few seconds, it’s an important part of your initial WordPress configuration. As a result, your website information will be updated immediately.
Quick Checklist
Before moving to the next section, confirm that you’ve completed the following tasks:
- Logged in to the WordPress Dashboard
- Also explored the main navigation menu
- Updated your Site Title
- Then added a professional Tagline
- Verified your Website Address
- Finally, saved your changes
Excellent! Your WordPress website is now configured with the correct basic information.
Step 13: Configure Your Time Zone
Setting the correct time zone ensures that scheduled posts, backups, and notifications occur at the right time. To begin, navigate to Settings → General, then scroll down until you find the Time Zone option. Next, choose the city or time zone that matches your location — for example, UTC+6 (Bangladesh), UTC (London), or UTC-5 (New York).
After selecting the correct time zone, review the remaining options, which also let you customize the Date Format, Time Format, and Week Starts On setting. Finally, click Save Changes.
Why Is the Time Zone Important?
Many beginners ignore this setting. However, an incorrect time zone can create unnecessary problems. For example, scheduled blog posts may be published at the wrong time. Likewise, backup schedules and plugin notifications may not match your local time. Therefore, it’s always worth checking this setting before launching your website.
Step 14: Change Your Permalink Structure
Permalinks determine the structure of your website’s URLs. By default, WordPress often creates links like this:
https://yourdomain.com/?p=123
Although this format works, it isn’t ideal for visitors or search engines. Instead, use descriptive URLs. Go to Settings → Permalinks, then select Post Name. Your URLs will now look similar to this:
https://yourdomain.com/how-to-install-wordpress-on-cpanel/
As a result, your links become cleaner, easier to read, and more SEO-friendly.
Why Choose the “Post Name” Option?
Many users ask which permalink structure is best. For most websites, Post Name is the recommended choice because it creates simple, descriptive URLs. For example:
✅ Recommended: https://yourdomain.com/wordpress-security-tips/
❌ Less User-Friendly: https://yourdomain.com/?p=457
Short URLs are easier to remember. In addition, they help search engines understand the topic of each page more clearly.
Step 15: Delete the Default Sample Content
A new WordPress installation includes sample content that’s only meant for demonstration purposes. Before creating your own content, remove these default items.
Delete the “Hello World!” Post Navigate to Posts → All Posts. You’ll see the default Hello World! post. Move it to the Trash.
Delete the Sample Page Next, go to Pages → All Pages, then delete the default Sample Page. Doing this keeps your website clean and professional from the very beginning.
Remove the Default Comment If a comment exists on the sample post, delete it as well. Otherwise, unnecessary content may appear on your website.
Step 16: Update Your Administrator Profile
Your administrator profile contains important account information. To access it, go to Users → Profile. Here, you can update several settings, including your Display Name, Nickname, Email Address, Language, Password, and Profile Picture (via Gravatar). Take a few moments to review each option carefully. If necessary, replace the automatically generated password with another strong and unique password.
Best Practices for Your Administrator Account
Keeping your administrator account secure is essential. To improve security, use a unique username, create a strong password, and update your recovery email address. Additionally, enable two-factor authentication if available, and avoid sharing your administrator account with others. Furthermore, review your account details regularly to ensure they remain accurate.
Step 17: Review Your Website
Before moving on, visit the front end of your website. Check whether the homepage loads correctly, whether the Site Title is displayed properly, and whether the URL uses HTTPS. Also look for spelling mistakes and confirm the website looks good on mobile devices. If you notice any issues, fix them now before adding new content, since a quick review at this stage can prevent larger problems later.
Quick Checklist
Before continuing, make sure you’ve completed each task below:
- Selected the correct Time Zone
- Also updated the Date and Time format
- Changed the permalink structure to Post Name
- Deleted the default post
- Then deleted the sample page
- Removed the default comment
- Updated your administrator profile
- Finally, reviewed your website on the front end
Excellent! Your WordPress installation is now properly configured and ready for customization.
Step 18: Install Your First WordPress Theme
A WordPress theme controls the overall design and layout of your website. Therefore, choosing the right theme is one of the most important decisions you’ll make.
To get started, go to Appearance → Themes, then click Add New Theme. You’ll find thousands of free themes in the official WordPress Theme Directory. Use the search bar to browse themes based on your website type — for instance, Business, Blog, Portfolio, eCommerce, Education, or Photography. Once you’ve selected a theme, click Install, and after the installation finishes, click Activate to make it live.
How to Choose the Right Theme
Although visual design matters, performance is equally important. Before installing a theme, check whether it offers mobile responsiveness, fast loading speed, regular updates, good user reviews, compatibility with the latest WordPress version, and support for popular plugins. In addition, preview the theme before activating it, since this allows you to see how it looks on both desktop and mobile devices.
Step 19: Customize Your Website
After activating your theme, it’s time to personalize your website. Navigate to Appearance → Customize. Depending on your chosen theme, you can usually modify the site logo, website colors, fonts, header, footer, homepage layout, navigation menus, and widgets.
Start with your branding, then upload your logo, choose consistent colors, and select readable fonts. As a result, your website will look more professional and trustworthy.
Step 20: Install Essential Plugins
Plugins allow you to add new features without writing code. Even though thousands of plugins are available, you should install only the ones your website actually needs, since keeping the number of plugins low improves performance and reduces maintenance.
SEO Plugin An SEO plugin helps optimize your website for search engines. For example, it can assist with meta titles, meta descriptions, XML sitemaps, and social sharing settings. Consequently, search engines can understand your content more effectively.
Security Plugin Website security should never be ignored. A good security plugin helps protect your website against malware, brute-force login attempts, suspicious activity, and unauthorized access. Furthermore, many security plugins provide regular monitoring and alerts.
Backup Plugin Backups are essential for every website. If something goes wrong after an update or unexpected error, you’ll be able to restore your website quickly. Whenever possible, schedule automatic backups instead of creating them manually.
Cache Plugin Caching improves your website’s loading speed by storing optimized versions of your pages. As a result, visitors experience faster page loading, while your server handles fewer requests. A faster website also contributes to better user experience and SEO.
Contact Form Plugin Every business website should include a contact form. Instead of displaying your email address publicly, use a secure form that allows visitors to send messages directly. This approach also helps reduce spam.
Step 21: Create Essential Pages
Now it’s time to build the pages your visitors expect to find. Although every website is different, most should include the following pages.
Home Page Your homepage introduces your website and explains what visitors can expect. Keep the content clear, organized, and easy to navigate.
About Page The About page tells visitors who you are and what you do. You can include company background, mission, experience, and team information. This page helps build credibility and trust.
Services Page If you offer products or services, create a dedicated Services page. Describe each service clearly and explain how it benefits your customers. Additionally, include a clear call-to-action so visitors know what to do next.
Contact Page Make it easy for people to reach you. Your Contact page may include a contact form, email address, phone number, business hours, office location, and Google Map (if applicable).
Privacy Policy Page Many websites collect visitor data through forms, cookies, or analytics tools. Therefore, creating a Privacy Policy page is both a good practice and, in many cases, a legal requirement.
Step 22: Create Your Navigation Menu
A clear navigation menu helps visitors move around your website. Go to Appearance → Menus. If your theme uses the Site Editor, navigate to Appearance → Editor instead. Then add your important pages, such as Home, About, Services, Blog, and Contact, and arrange them in a logical order before saving the menu. Simple navigation improves both usability and user experience.
Step 23: Test Your Website
Before launching your website, review every important page carefully. Check whether all links work correctly, whether images are loading properly, and whether the navigation menu is working. Also confirm that the contact form sends messages and that the website displays correctly on mobile devices, and look for any spelling mistakes. Fixing these issues now creates a much better first impression for your visitors.
Quick Checklist
Before continuing to the final section, make sure you’ve completed these tasks:
- Installed a responsive WordPress theme
- Also customized your website
- Added the essential plugins
- Then created your main pages
- Built a navigation menu
- Finally, tested your website
Excellent! Your website now looks professional and includes the features needed for everyday use.
Step 24: Optimize Your Website Speed
Website speed affects both user experience and search engine rankings. If your pages take too long to load, visitors may leave before they even read your content. Fortunately, there are several simple ways to improve loading speed.
Optimize Images Before Uploading Large images often slow down websites. Before uploading any image, resize it to the correct dimensions, compress the file size, and use modern formats like WebP whenever possible. Also add descriptive file names and write meaningful alt text. For example, instead of uploading IMG_1024.jpg, use how-to-install-wordpress.jpg. As a result, your website loads faster while also improving image SEO.
Enable Website Caching Caching creates temporary versions of your pages, allowing visitors to load them more quickly. Because fewer server resources are required, your website can handle traffic more efficiently. Moreover, faster loading times improve the overall browsing experience.
Remove Unnecessary Plugins Although plugins add useful features, installing too many can reduce performance. Instead, review your installed plugins regularly. If you no longer use a plugin, delete it rather than leaving it inactive. This simple habit helps keep your website clean and efficient.
Step 25: Keep WordPress Updated
Regular updates improve security, compatibility, and performance. For that reason, check for updates frequently, including WordPress Core, themes, and plugins. Before applying any update, create a full backup of your website, so that you can restore your site quickly if something unexpected happens.
Step 26: Improve Your Website SEO
Publishing great content is important. Nevertheless, technical SEO also plays a major role in helping search engines understand your website. Here are a few essential SEO practices.
Use Clear Page Titles Every page should have a unique title, such as Home, About Us, Services, Contact, or Blog. Clear titles improve navigation and help search engines understand your content.
Write Helpful Content Instead of publishing short articles, focus on creating detailed guides that answer real questions. For instance, if your website is about WordPress, you can publish articles covering website security, SEO tips, plugin tutorials, theme customization, and website speed optimization. As you continue publishing useful content, your website can gradually build authority.
Use Internal Links Internal links connect one page of your website to another. For example, you can link a blog post about WordPress security to another article about website backups. Consequently, visitors spend more time on your website, while search engines discover your content more efficiently.
Step 27: Protect Your Website
Website security should always remain a priority. Although WordPress is secure, following a few extra precautions can reduce potential risks.
Use Strong Login Credentials Choose a unique administrator username. Likewise, create a strong password using letters, numbers, and special characters. Avoid common passwords such as password123, admin123, or qwerty.
Enable Two-Factor Authentication Whenever possible, enable two-factor authentication. This additional security layer makes unauthorized access much more difficult.
Schedule Automatic Backups Regular backups protect your website from unexpected problems. For example, if your website becomes infected with malware or an update causes an error, you can restore a recent backup quickly. Because backups are essential, store copies in a secure location outside your hosting account whenever possible.
Step 28: Perform Regular Website Maintenance
Routine maintenance helps prevent many common WordPress issues. Set aside a little time each month to complete these tasks.
Monthly Maintenance Checklist
- Update WordPress
- Also update themes
- Update plugins
- Then review website speed
- Test contact forms
- Remove spam comments
- Check for broken links
- Scan for malware
- Verify recent backups
- Finally, publish fresh content
Following this checklist consistently keeps your website healthy and reliable.
Common Mistakes When Installing WordPress on cPanel
Many new website owners make similar mistakes. Fortunately, you can avoid most of them by following a few simple guidelines. In particular, avoid installing too many plugins, ignoring software updates, using weak passwords, and uploading oversized images. Likewise, steer clear of downloading themes from untrusted sources, forgetting to back up your website, and leaving unused plugins installed. Instead, focus on keeping your website simple, secure, and well organized.
FAQs About Installing WordPress on cPanel
How long does it take to install WordPress? In most cases, the installation takes between 2 and 5 minutes when using Softaculous.
Do I need coding knowledge? No. Because Softaculous automates the installation process, beginners can install WordPress without writing any code.
Can I change my theme later? Yes. You can switch themes whenever you like. However, some theme settings may need to be configured again after the change.
Is WordPress free? Yes. WordPress is open-source software and can be downloaded for free. However, you’ll still need a domain name and a hosting plan to publish your website online.
What should I do after installation? After installing WordPress, you should customize your theme, install essential plugins, create important pages, improve website security, publish high-quality content, and maintain your website regularly.
Final Thoughts on Installing WordPress on cPanel
Installing WordPress on cPanel is one of the easiest ways to build a professional website. Thanks to Softaculous, learning how to install WordPress on cPanel is quick, beginner-friendly, and requires very little technical knowledge.
Even so, your website’s long-term success depends on more than just installation. Regular updates, strong security practices, quality content, and ongoing optimization all contribute to a better user experience. By following every step in this guide, you’ll create a website that’s secure, fast, mobile-friendly, and ready to grow.
Finally, continue learning and improving your website over time, since small improvements made consistently can lead to significant results in the future.
Quick Summary
- Installed WordPress
- Configured Settings
- Installed Theme
- Added Plugins
- Improved Security
- Optimized SEO
Next Steps
Now that your WordPress website is ready, it’s time to publish valuable content, improve your site’s performance, and monitor its growth. Keep your WordPress installation updated, create helpful articles regularly, and focus on providing a great user experience.
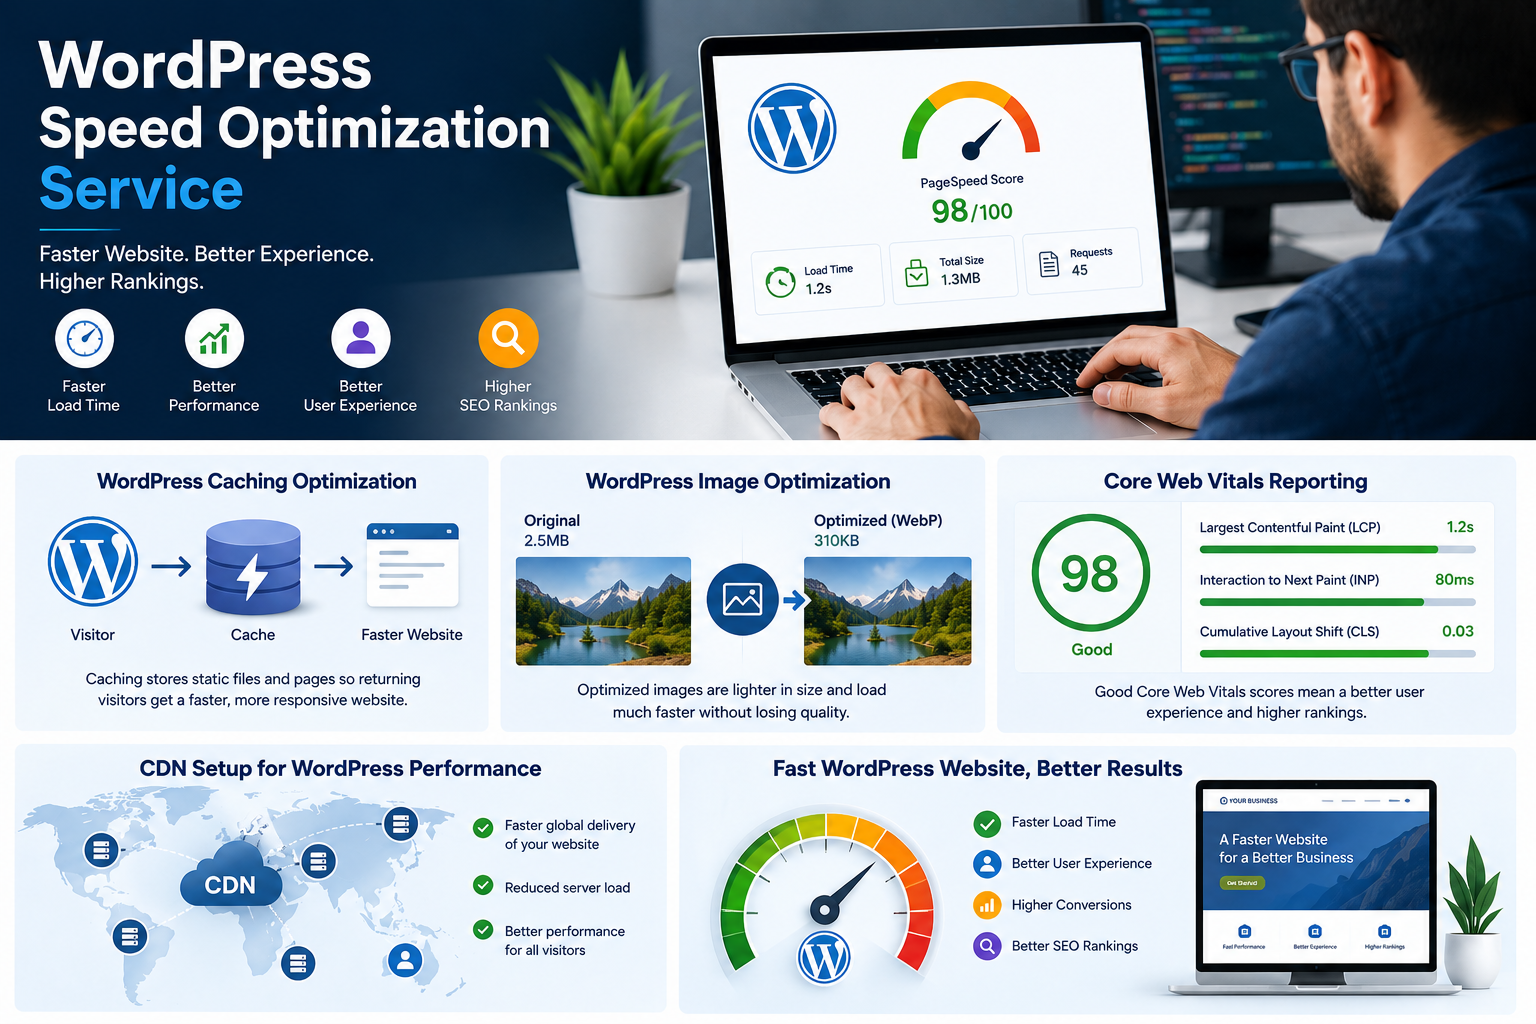
If you need professional assistance with WordPress website design, speed optimization, SEO, or ongoing maintenance, Web Dream Agency is here to help. Contact us today to build a fast, secure, and search-engine-friendly website.